HOTLINE: 0908 340 239
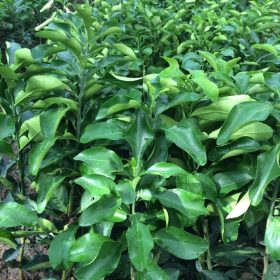
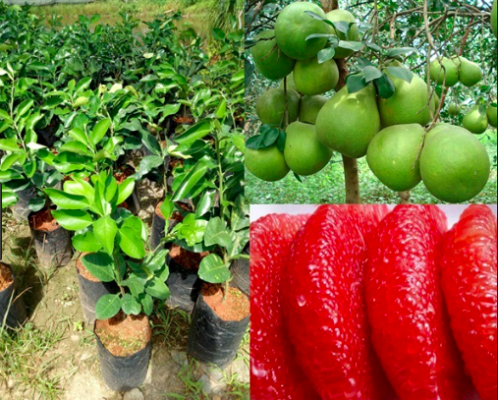
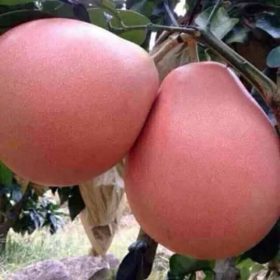
To produce high-quality pomelo fruits that meet domestic market demands and export standards, farmers must pay attention to the origin and quality of the seedlings. The trees originate from Luan Van village, Tho Xuong commune, Tho Xuan district, Thanh Hoa province. As a local specialty variety, the tree grows vigorously and branches strongly. Ripe fruits have red skin and red pulp. Layered (air-layered) pomelo trees: Diameter from 1 – 1.5 cm, height about 60 – 80 cm, with 2-3 primary branches grown in nursery bags, featuring new secondary roots before planting. Grafted pomelo trees: Rootstock diameter from 0.8 – 1 cm, branch height about 25 – 30 cm, healthy and free of pests and diseases.
Luan Van pomelos are best planted during two seasons of the year:
Spring season: February, March, April
Autumn-Winter season: August, September, October
For loose loamy soil, the suitable distance between two plants is 5 x 5 m (400 trees/ha), equivalent to 15 trees per Bac Bo sao (360 sq m).
For firm, poor hilly soil, the distance is 4.5 x 4.5 m (500 trees/ha), equivalent to 18 trees per Bac Bo sao.
Note: Luan Van pomelos grow best in yellow-red soil on clay stone and metamorphic rock, or alluvial soil with a yellow-red mottled layer, a topsoil layer thicker than 30 cm, loose and moist.
Plow and harrow the soil thoroughly, pick up all weeds.
Make ridges spaced 5 m apart with a turtle-back shape, ditches 30 – 40 cm wide, 20 cm deep, ridge center 30 – 40 cm higher than the ditch bottom.
Dig pits and build mounds:
Dig pits in poor soil with dimensions: 80 x 80 x 60 cm (width, length, depth).
Dig pits in good soil: 60 x 60 x 50 cm.
In low-lying areas, build mounds 50 – 60 cm high, with a diameter of 0.8 – 1 m.
Well-rotted manure: 20 – 30 kg (up to 40 kg)
Superphosphate: 1 kg
Agricultural lime: Determine the amount of lime based on soil pH. Farmers should determine the pH before applying lime. Generally, if pH < 5 or 5.5, apply 20 – 25 kg of lime per Bac Bo sao, applied 15 – 20 days before or after other fertilizers.
Pits should be dug about 1 month before planting. Mix all the aforementioned fertilizer thoroughly with the topsoil layer, put it into the bottom of the pit, then fill and shape a mound 15 – 20 cm higher than the pit surface. Dig a small hole to place the root ball, then pack the soil tightly. Next, insert an X-shaped cross stake next to the plant and tie it to prevent the roots from shaking, which could cause the plant to die. Then, cover the base completely with mulch, dried grass, and water the plant thoroughly at least once a day until it recovers growth. Afterward, adjust watering based on weather and growth conditions (pay special attention during the first 30 days after planting).
Watering: Provide sufficient water for the tree, especially during the dry season, when fruits are growing, and right before ripening.
Weed Control: Cover the base with grass, debris, or green manure to suppress weeds; loosen the soil crust after heavy rains. Weed during the spring season (January–February) and autumn season (August–September), weeding the entire area once per crop; loosen the soil around the base 2–3 times a year.
Pruning for trees in the non-fruiting stage: Pruning begins right at planting. To achieve a proper shape, follow these steps:
Primary (Level 1) branch formation: When the sapling reaches a height of 45 – 50 cm, pinch the growing tip to form primary branches. Leave only 3 – 4 primary branches distributed relatively evenly in all directions. Choose healthy, straight branches spaced 7 – 10 cm apart on the main trunk, forming an angle of approximately 45 – 60 degrees with the trunk for an even and airy canopy framework.
Secondary (Level 2) branch formation: When primary branches reach 25 – 30 cm in length, pinch the tips to form secondary branches. Usually, keep 3 secondary branches per primary branch, well-distributed in angles and directions.
Tertiary (Level 3) branch formation: Tertiary branches are fruit-bearing branches for subsequent years. Control these branches so they do not cross each other and are arranged in different directions to optimize photosynthesis.
Pruning for trees in the fruiting stage:
Post-harvest pruning: Performed after harvesting fruit. Prune out all diseased, dead, water-sprout branches, excessively dense branches, and thin out primary branches (if too dense) to maintain a balanced canopy structure.
Spring pruning: Conducted from mid-January to mid-March annually: Cut off poor-quality spring shoots, diseased branches, tangled branches inside the canopy, and small, dense, deformed flower clusters.
Summer pruning: Conducted from April through June: Cut off overly dense or weak summer shoots, diseased branches, and thin out small, deformed fruits.
Fertilize annually during these periods:
Basal fertilization (August – November): Organic fertilizer + Superphosphate + Lime.
Pre-blossom and spring shoot fertilization (January 15 – March 15): Urea + Potassium.
Fruit-fattening fertilization (May – July): Urea + Potassium.
Additionally, fertilize after harvest to help the tree recover quickly using the following rates:
Urea: 0.1 – 0.2 kg/tree
Superphosphate: 0.2 – 0.5 kg/tree
Potassium: 0.1 – 0.3 kg/tree
In subsequent years, increase fertilizer amounts based on tree age, yield, and soil type.
Organic fertilizer: Dig a trench around the tree along the drip line, 30 – 40 cm wide and 20 – 25 cm deep, spread the fertilizer, cover with soil, and water to retain moisture. Alternatively, dig 3 annular trenches around the canopy to fertilize, and apply to the remaining sections the following year.
Inorganic fertilizer: When the soil is moist, simply broadcast the fertilizer on the ground surface along the drip line, 20 – 30 cm away from the base, then water to dissolve it. During dry weather, dissolve the fertilizer in water for irrigation, or broadcast along the drip line, lightly loosen the soil, and water.
1st application (Post-harvest): Apply along the outer edge of the canopy, dig a trench 20 cm deep and 30 cm wide. Mix fertilizers evenly, put them in the trench, cover tightly with soil, and mulch with straw to retain moisture.
2nd and 3rd application: Mix chemical fertilizers evenly and broadcast them within the canopy circle, loosen the soil 4 – 5 cm deep to bury and cover the fertilizer, and mulch with straw and organic debris. After fertilizing, water evenly and moderately so the fertilizer dissolves for gradual absorption. Do not overwater, as excess water will trigger new flush growth, which disrupts flowering induction.
Pomelos are commonly damaged by several pests and diseases:
Common issues: Fungal diseases, leaf miners, stem and branch borers, red spiders, white spiders, fruit flies, gummosis, dry branch disease, sooty mold, etc.
Fungal diseases: Rust-colored spots on leaves, black spots on stems. Use SCORE or 1% Copper Sulfate, spray every 3 days until cured.
Stem and branch borers: Apply lime to the base and trunk, use a syringe to inject Supracide 0.2% directly into the boreholes.
Leaf miners: Spray Selecron onto the leaves. This chemical is also effective against leaf-eating caterpillars, red spiders, and other pests.
Aphids/Mealybugs: Upon detection, spray Selecron for three consecutive days.
Fruit flies: Suck plant juices causing fruit rot; active from July to October. Use bait containing Naled 5% + Methyl Eugenol 95% per 100 m2.
Stink bugs: Spray Sherpa 0.2% or Dipterex 0.3%. Alternatively, if pest populations are low, hand-pick and destroy them.
Sooty mold (on stems, branches, leaves, fruits): Active from February to October. Spray Bordeaux mixture 1% or 1% Copper Sulfate combined with pruning to thin out the canopy and branches.
Gummosis (bark rot): Active in April, May, September, October. Spray Aliette 0.3% onto trunks and branches once a week until cured.
Harvest fruits at the correct stage of maturity.
Cut the fruit away from the pomelo tree and immediately submerge it in clean fresh water.
Mix a small amount of lime water.
Trim the fruit stem directly inside the clean fresh water, then remove from the water and dry with a clean towel.
Allow the fruit to dry completely and apply lime water to the stem scar.
The storage location must be cool and well-ventilated.
Wash clean sand with lime water and drain it. (This is crucial, as some preservation recommendations using untreated sand have caused fruit rot to spread throughout the stored batch).
Arrange wooden boards or slatted compartment frames in the storage area.
Cover the boards, frames, or compartments with a layer of sand 8 – 10 cm thick, with the width depending on the storage space and the quantity of pomelos to be stored.
Place the processed pomelos from Step 1 onto the sand layer.
Arrange the pomelos in square grid rows, leaving 5 cm between rows and 5 cm between fruits.
After finishing the first layer of fruit, cover it with another layer of sand 5 – 10 cm thick, then place the second layer of fruit. Repeat this process, stacking only 5 to 6 layers to facilitate future inspections.
Top off the very final layer with a 10 cm thick layer of sand.
 Zalo
Zalo